How to take a short movie that is on 2 dts discs and burn a copy so the entire movie fits on one disc.
(AKA: how to cram
the third "Lord of the Rings" movie onto 2 discs)
(Please see "benefits" at the bottom of this page)
Got a cdrom burner and some blank 700MB CD-Rs? You've got all
you need.
(Apologies to those who are fully versed in the art of burning discs,
since this will literally be step-by-step.)
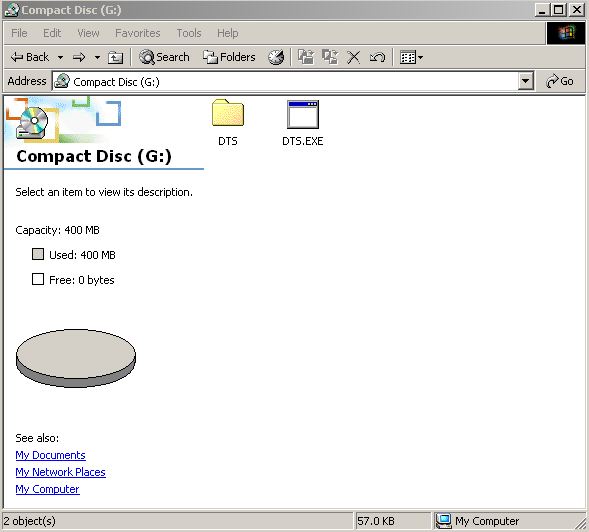
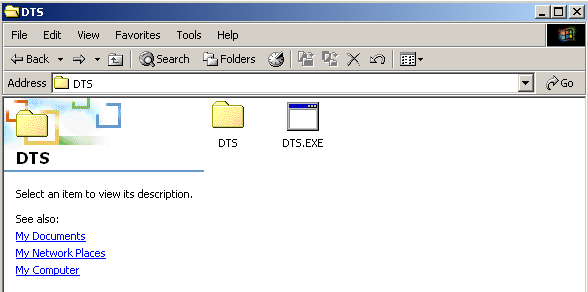
Insert disc A of the movie you are going to re-assemble into your computer's
cdrom drive. In the "root directory" (shown) you will have a folder
called "DTS" and a file called "DTS.EXE"
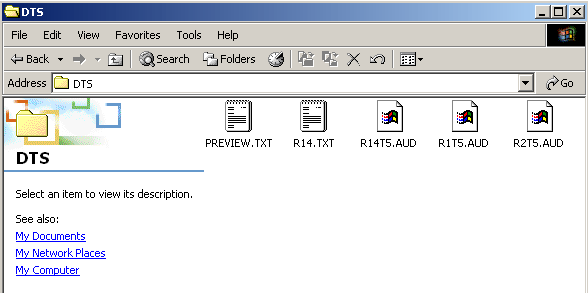
Inside the "DTS" folder you will find various files. In this disc "A" of this particular example there is:
PREVIEW.TXT
R14.TXT
R14T5.AUD
R1T5.AUD
R2T5.AUD
It is important to note that any trailers that have been printed on
feature discs are always titled "R14T5.AUD". The text file "R14.TXT"
tells which trailers are on the disc. Frequently these trailers eat
up so much space on the disc that a short movie must be spread out over
2 discs. If you aren't having a love affair with playing trailers
in dts, or intentionally want to ensure that they do not,
when you make your burned copy you may simply not include those files.
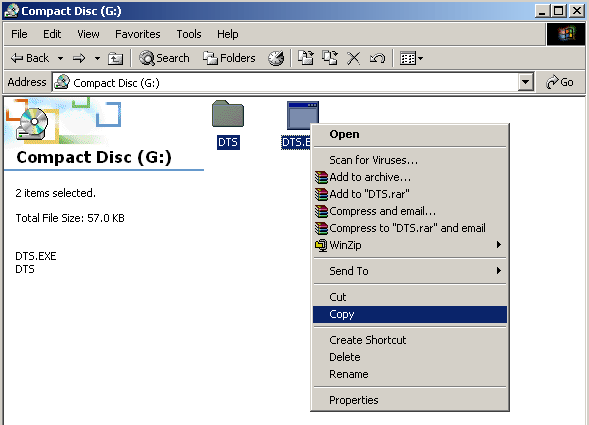
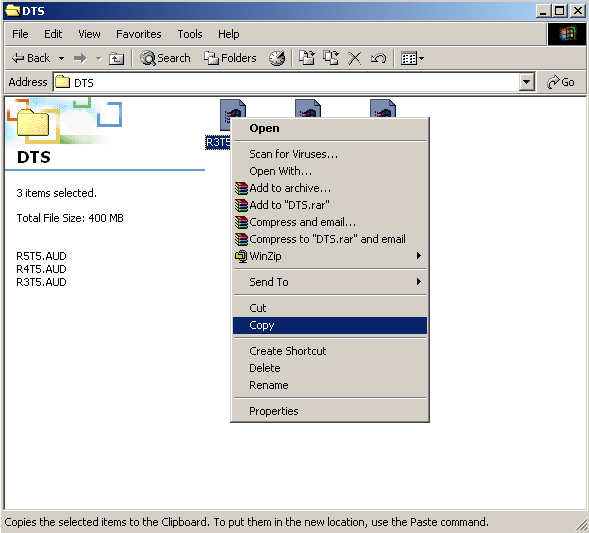
Click the BACK button so you are at the root directory of the cdrom drive. Hold the CTRL button down while you left click on the "DTS" folder as well as the "DTS.EXE" file. Now right click one of the files and select COPY.

Head over to whichever hard drive you plan on temporarily storing these
files. In this instance we have selected to store them on drive C.
Right click inside this folder and select NEW --- FOLDER.
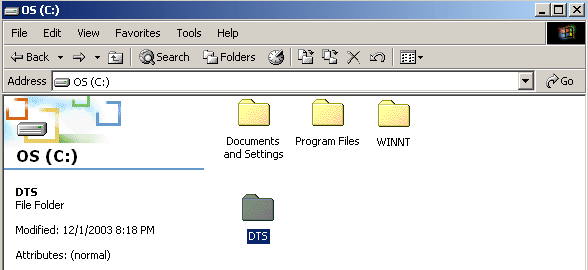
When the folder appears, simply type DTS or whatever you want to call this temporary folder. (You will delete it once you are finished.)

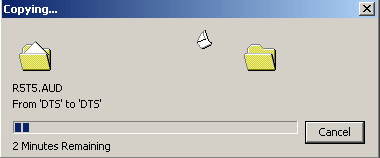
Now open up the folder and right click and select PASTE. The contents from the disc will now be copied to this folder on your hard drive.
When the files have finished transferring, you will have a copy that looks just like this. Now eject the "A" disc and insert the "B" disc into your cdrom drive.
This time go into the "DTS" folder and select all of the individual AUD files inside of it, right click and select COPY.
Go back to the DTS folder (or whatever you labeled it as) on your hard drive and open the DTS folder that is beside the DTS.EXE file, then right click and select PASTE.
The remaining files will transfer.

When all of the files have transferred, inside that "DTS" folder will be everything from the two discs, as if you had one HUGE cdrom.
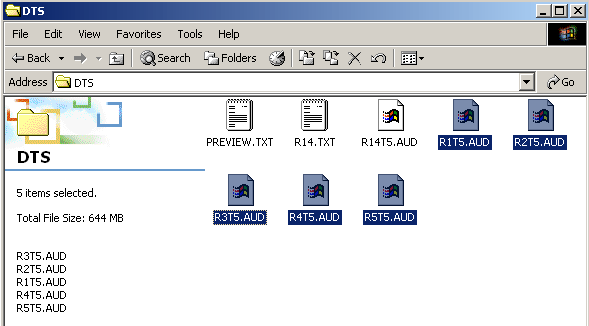
Highlight all of the MOVIE files. For your reference:
R1T5 = reel 1
R2T5 = reel 2
R3T5 = reel 3
...and so forth.
Now the left side of the screen where it says "Total File Size: 644MB".
As you can see, all of these files would EASILY fit onto a 650MB disc when
you delete the trailer files...so let's do that.
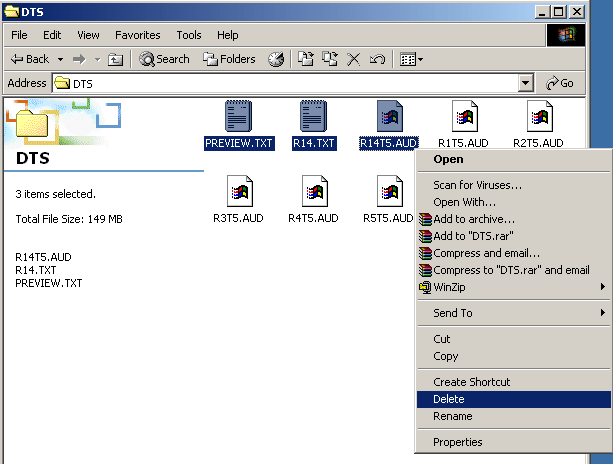
Highlight the 3 trailer files, right click and select DELETE, then press ENTER.
You should now have a folder on your hard drive that looks like this, with a "DTS" folder and a "DTS.EXE" file in it. It is important to note that the finished disc only needs ONE copy of "DTS.EXE" on it. Do not copy both of them. You may copy either one, they are identical files.
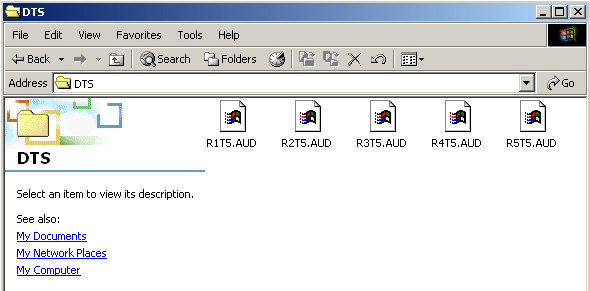
If you were to open that "DTS" folder above, you would see ONLY the movie files for reels 1-5 (the complete feature).
Now you are ready to burn your 2 disc movie onto 1 disc.
For this example, we are using Nero 5 burning software. You may however use most any burning software.

Select CD-ROM (ISO) disc and click NEW.
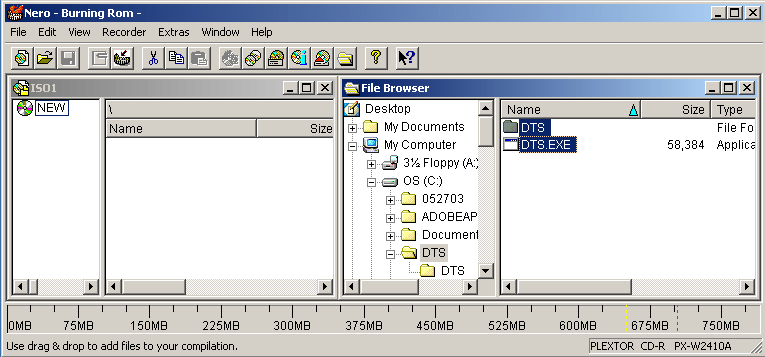
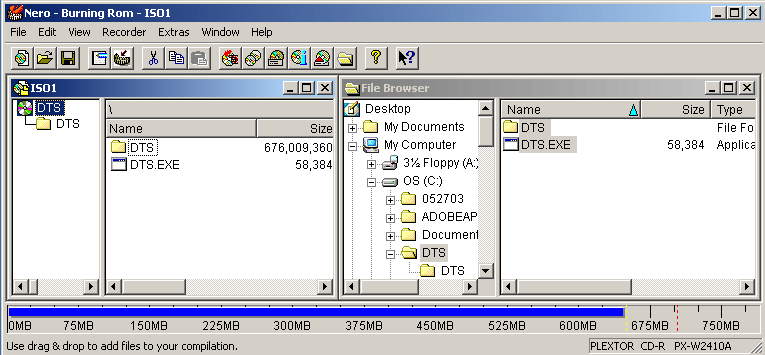
Browse to your hard drive and find the folder "DTS" and open it. As you can see on the right side of the screen above inside that folder is the folder "DTS" and the "DTS.EXE" file. Highlight those two items and drag them over to the left side of the screen.
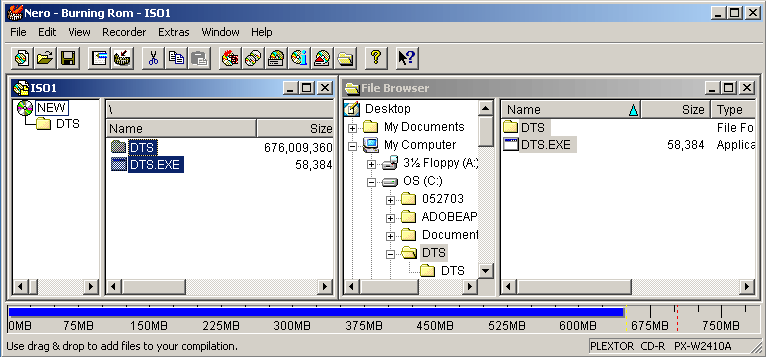
Your screen should now look like this. Looking at the blue line at the bottom of the screen, you have only used about 650MB of space on your 700MB blank disc. (Remember, the R1T5.AUD, R2T5.AUD, R3T5.AUD, R4T5.AUD and R5T5.AUD files are inside that DTS folder.)
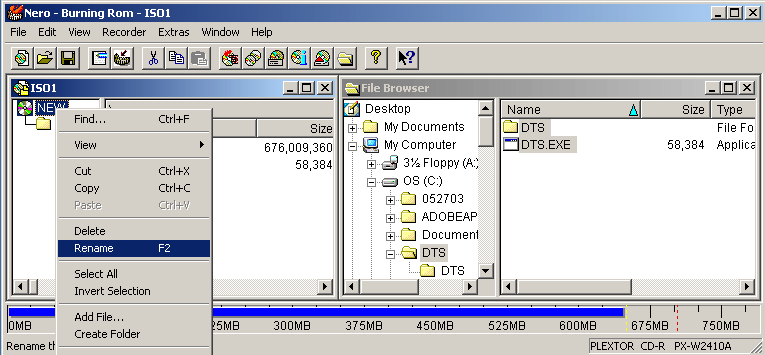
Now before you burn that disc, right click on the name of the CD to be burned and select RENAME.
Rename it to read "DTS". Your new dts cd has now been compiled and is ready for burning. Click FILE and then WRITE CD and this screen will appear...
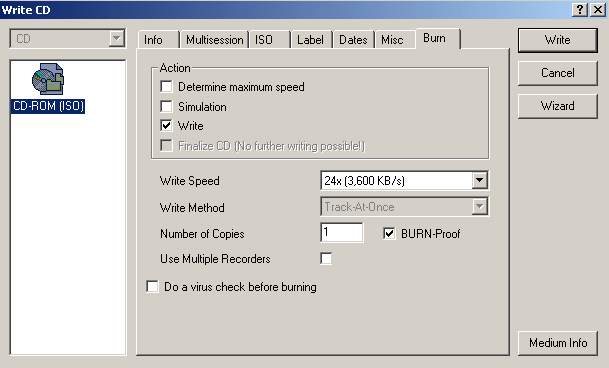
Assuming you have burned discs on this computer before, all you now have to do is click WRITE and wait for the cd to be burned.
BENEFITS OF THIS PROCEDURE
There are many benefits of re-burning dts discs.
***Please note this assumes you are burning with 700MB CD-Rs, and not
650MB discs like dts uses.***