January 2010 photos from the Brad Miller collection.
89 KB · 625x469
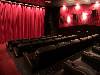
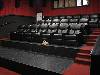
This is the current Film-Tech screening room.
|
| 
93 KB · 625x469
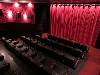
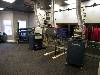
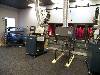
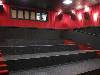
There are two major changes in the design of the auditorium ... |
| 
90 KB · 625x469
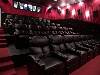
...as well as a much steeper stadium seating. |
| 
89 KB · 625x469
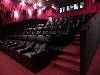
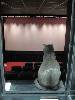
The sound system was also upgraded to QSC speakers, but more... |
| 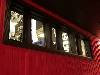
83 KB · 625x469
The port windows have expanded to make room for digital cine... |
|
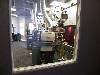
95 KB · 625x469
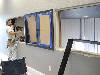
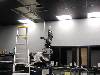
Here is the booth as viewed through the "viewing window... |
| 
104 KB · 625x469
Inside we will see a familiar setup, but with much, much mor... |
| 
101 KB · 625x469
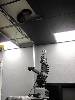
This is the booth as viewed looking toward the left. The so... |
| 
111 KB · 625x469
35mm and 70mm film may be ran here via platter or automated ... |
| 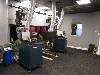
101 KB · 625x469
The room is not officially "finished" at this poin... |
|
114 KB · 469x625
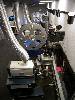
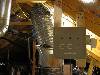
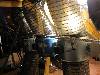
The penthouse stack got a bit taller this time due to the ad... |
| 
81 KB · 625x469
The platter sits out of the way in the corner along with its... |
| 
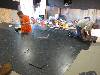
95 KB · 625x469
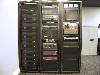
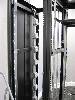
From left to right we have a rack of QSC DCA amplifiers. Th... |
| 
107 KB · 469x625
A closer shot of the newly revised penthouse stack. |
| 
114 KB · 625x469
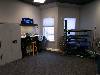
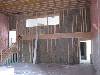
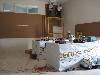
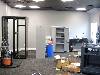
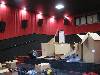
That was now, this is then. Pictured here is how the room s... |
|
87 KB · 625x469
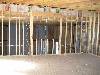
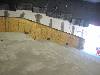
This was the auditorium. At this point the only thing that ... |
| 
114 KB · 625x469
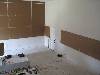
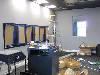
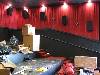
Reverse shot of the room as the first layer of insulation st... |
| 
98 KB · 625x469
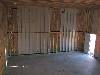
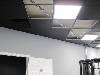
And then a second layer is added. |
| 
71 KB · 625x469
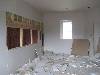
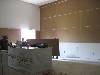
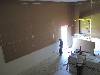
The booth gets it's drywall. |
| 
70 KB · 625x469
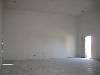
The drywall is now done. |
|
49 KB · 625x469
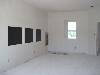
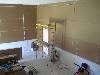
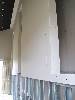
Shot of the screen wall in the auditorium. |
| 
52 KB · 625x469
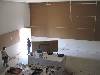
Shot of the booth wall in the auditorium. |
| 
51 KB · 625x469
The booth is almost done (as far as the builder is concerned... |
| 
86 KB · 625x469
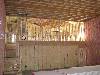
Now comes the good stuff...DURRA! |
| 
67 KB · 625x469
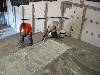
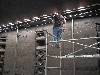
Rock-N-G Drywall was hired to install Durra's Type 8 wa... |
|
74 KB · 625x469
More Durra installation. |
| 
65 KB · 625x469
More Durra installation. |
| 
72 KB · 625x469
Almost finished with the first layer. |
| 
78 KB · 625x469
Here the speaker lines have been pulled through the Durra. |
| 
80 KB · 625x469
Here you can see where the furring channels have been added ... |
|
72 KB · 625x469
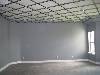
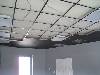
Meanwhile the drop ceiling grid in the booth has been finish... |
| 
69 KB · 625x469
Another shot of the booth after the drop ceiling grid has be... |
| 
77 KB · 625x469
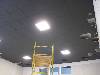
The drop ceiling in the auditorium is also finished at this ... |
| 
80 KB · 625x469
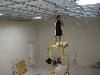
The drop ceiling tiles are now being added. |
| 
62 KB · 625x469
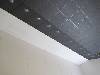
Here is the finished edge of the drop ceiling next to the cu... |
|
66 KB · 625x469
This is the drop ceiling as the HVAC vents are being brought... |
| 
74 KB · 625x469
Similarly the same thing is going on in the booth. |
| 
88 KB · 625x469
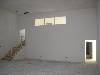
It is now time for port windows. |
| 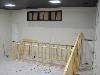
77 KB · 625x469
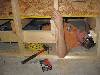
Next comes the stadium risers. |
| 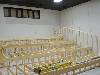
92 KB · 625x469
The framework is now complete. |
|
86 KB · 625x469
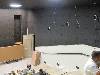
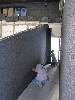
Meanwhile, progress begins on the speaker baffle wall. |
| 
67 KB · 469x625
This picture better shows the angled lights that will shine ... |
| 
85 KB · 625x469
The floor of the booth has been prepped and is ready for car... |
| 
102 KB · 625x469
Carpet squares are being used in the event there is damage t... |
| 
78 KB · 625x469
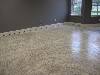
The carpet is now complete. |
|
99 KB · 625x469
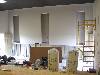
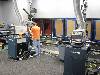
The first items are brought into the booth. |
| 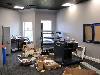
96 KB · 625x469
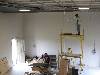
At this point it is mainly electrical work to be performed. |
| 
93 KB · 625x469
The first piece of conduit has been ran... |
| 
65 KB · 625x469
...up over the drop ceiling and into the sound rack... |
| 
103 KB · 469x625
...to provide all of the circuits to power the sound system. |
|

115 KB · 625x469
Here the high and low voltage wireways have been installed. ... |
| 
102 KB · 625x469
Power is added underneath the stadium risers for the motoriz... |
| 
81 KB · 625x469
Duct liner has been added to the walls, sconce light conduit... |
| 
81 KB · 625x469
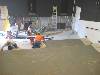
It is now time for the floor. |
| 
81 KB · 625x469
This step was necessary to smooth out any imperfections in t... |
|
93 KB · 625x469
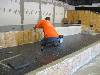
Here the glue is being applied to the floor. |
| 
98 KB · 625x469
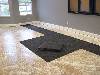
Tiles are then put into place. |
| 
93 KB · 469x625
Meanwhile wall carpet goes up. |
| 
107 KB · 625x469
Here the final touches are added to the tile. |
| 
84 KB · 625x469
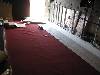
The floor carpet is also laid down. |
|

75 KB · 625x469
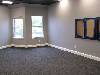
The auditorium is now ready for seats, speakers, curtains an... |
| 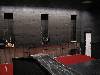
85 KB · 625x469
Another shot of the auditorium pre-seats, speakers, curtains... |
| 
82 KB · 625x469
The finished riser floor. |
| 
70 KB · 625x469
The seats and speakers have arrived. What is Josh thinking? |
| 
96 KB · 625x469
The speaker installation begins. |
|
99 KB · 625x469
A material lift was needed to get the speakers into place. |
| 
93 KB · 469x625
The stage speakers are assembled in place. |
| 
88 KB · 469x625
Behind the baffle wall. |
| 
113 KB · 625x469
It is now time for Pickett Stage and Screen to do their thin... |
| 
76 KB · 625x469
Wall curtains are installed. |
|
96 KB · 625x469
Surround speakers are installed next. |
| 
107 KB · 625x469
The left wall. |
| 
127 KB · 625x469
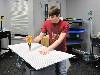
Pops, Kevin and Ed start designing the screen frame and mask... |
| 
101 KB · 625x469
Kevin is busy prepping the curtain track. |
| 
88 KB · 625x469
Once Pickett's crew is finished, the room is cleared in... |
|
88 KB · 625x469
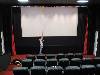
Here half of the seats have been installed. |
| 
83 KB · 469x625
The Dude waites patiently for the last of the chairs to be i... |
| 
87 KB · 625x469
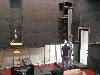
It is now time to start cutting holes in the ceiling for exh... |
| 
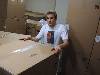
78 KB · 469x625
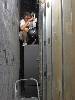
Hi Josh. |
| 
109 KB · 625x469
The exhaust system in progress. |
|
74 KB · 625x469
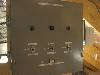
This is the override controller that is interfaced into the ... |
| 
114 KB · 625x469
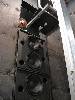
Here are the 3 exhaust fans. (At this point the middle proj... |
| 
116 KB · 625x469
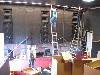
The install is getting closer to completion. |
| 
109 KB · 625x469
Link supervises from a safe distance. |
| 
101 KB · 625x469
Dan prepping covers for the booth lighting. |
|
75 KB · 625x469
Here the room is being EQ'd while Dan replaces a bulb t... |
|

 Home
Home