Cutting Trailers Properly
Recommendations for assembling trailers
With all of the various leaders currently being used for trailers, it can be difficult to determine exactly where to make the cut. Cutting trailers on the first frame of the green band is not ideal, as many projectors will exhibit a small jump at the splice, dirt has the highest tendency to collect right at a splice and it tends to give the trailer presentation a rushed feeling. By leaving as much black leader as possible, these benefits will be obtained. The tips here are assuming your theater will be preserving the MPAA's green bands.
ARTISAN/MIRAMAX/USA FILMS
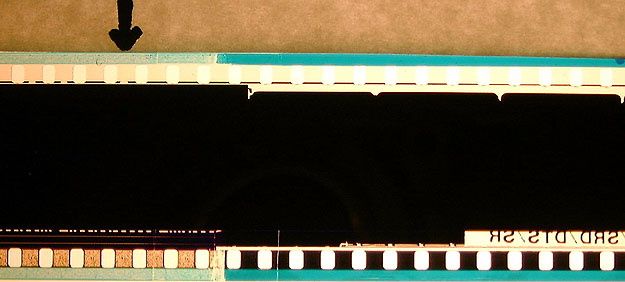
The arrow marks the ideal place to cut the head leader from these trailers.
It is important to note this cut should NOT be made 4 perforations to the
right, as there is considerable soundtrack damage. The end of the
white edgemarks + 4 perforations make the frame line an easy find.
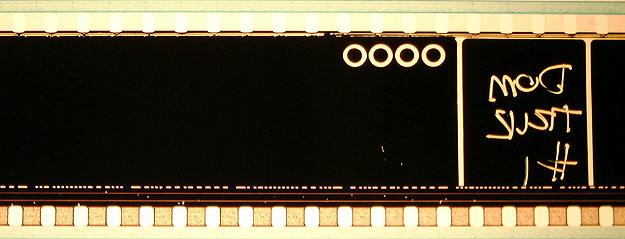
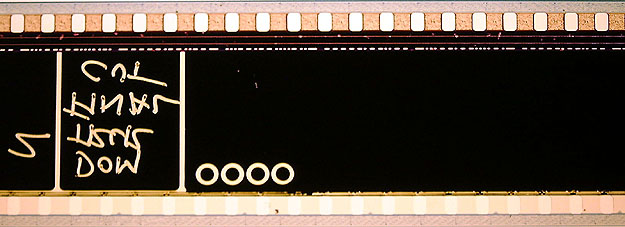
Now here comes the problem. Normally the cut at the tail leader
would be made just to the left of the "oooo" mark. Take a close look
at the soundtrack. Trailers coming from the Deluxe lab are plagued
with this negative dirt on the soundtrack during the end black. Generally
this only affects roughly 8 frames. A tip farther down this page
makes finding the frameline on these tails easy.
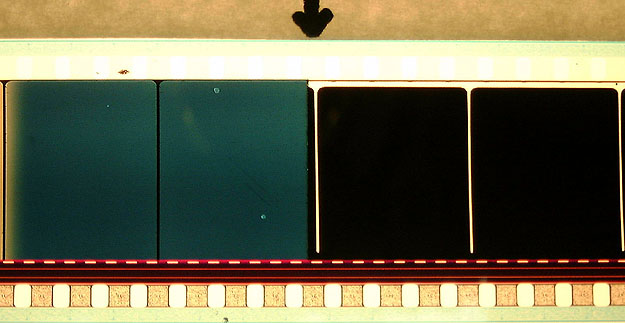
PARAMOUNT/UNIVERSAL
What could be easier? Not much. This is a fantastic example
of an ideal head leader.
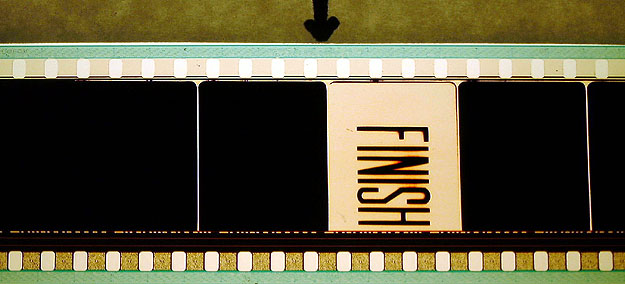
The tail leader is fairly obvious as well where to cut. Just
find the first clear edgemark and chop it there. It is important
to cut these last several frames of black out, as they will show on the
screen against the right masking. Unfortunately, the final frames
of black are typically few.
NEW LINE
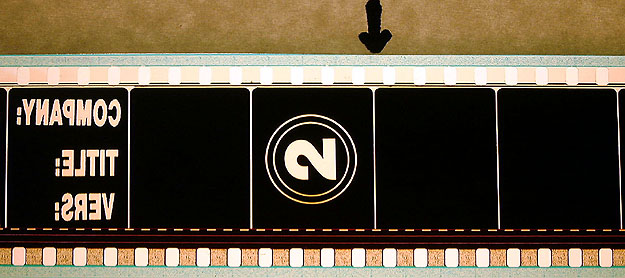
This is perhaps the best trailer leader currently being used today.
Find the "2" and cut on the nicely marked frameline right beside it!
The end of the trailer is also incredibly easy to locate the frame
line. This should be the standard for ALL trailer leaders.
Hats off to New Line Cinema!
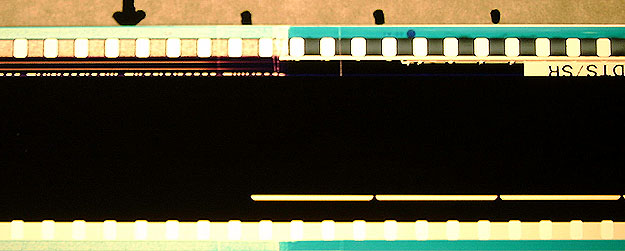
SONY
Look familiar? This is the same head leader used by Paramount
and Universal.
Unfortunately, we have the trademark Deluxe negative soundtrack dirt
to contend with. The negative dirt on Sony trailers tends to make
it's way as much as 16 frames into the black. Again, see the tip
below for finding the actual frame line.
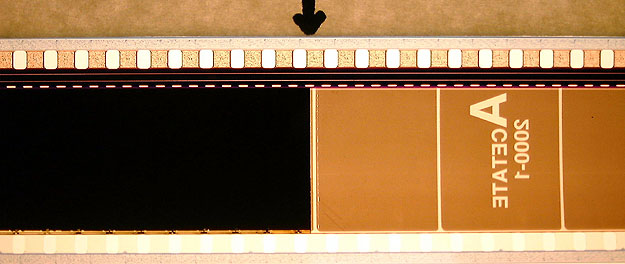
FOX
Fox trailers are very easy to find the starting frame of black, but
it is useless if your theater is ideally cropped to SMPTE standards..
Those white edges opposite the soundtrack look very unprofessional on the
screen and run right up to the green band! We recommend ultrasonic
splicing some black from another trailer in place of this leader, but in
the absense of an ultrasonic splicer in the booth, the above arrow dictates
the ideal position of the cut.

Just like Paramount and Universal, Fox provides an easy to find tail
marker. Unfortunately Fox is VERY stingy on tail black leader and
if you get a trailer from Fox with a mere 8 tail frames of black, be happy.
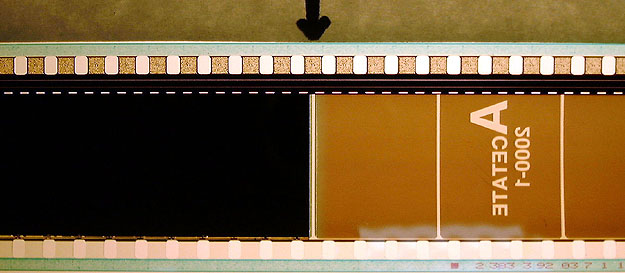
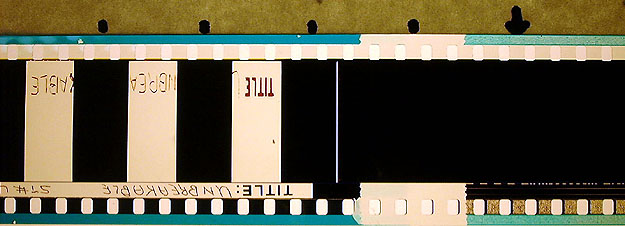
DREAMWORKS
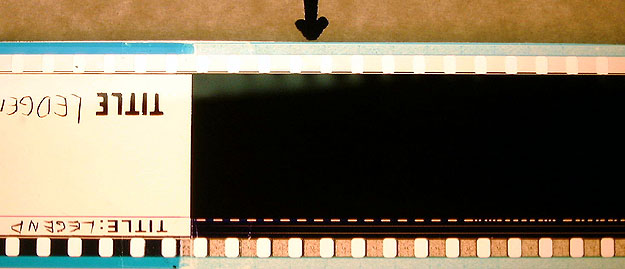
Dreamworks uses the Technicolor lab to print their trailers.
Technicolor has adopted this standard for their leaders. Simply count
over 4 perforations from the clear to black edge next to the "title" notation
and cut. It is important to cut 4 perforations over due to the soundtrack
damage on the first frame as well as a horizontal splice line in the picture
on that first frame of black.
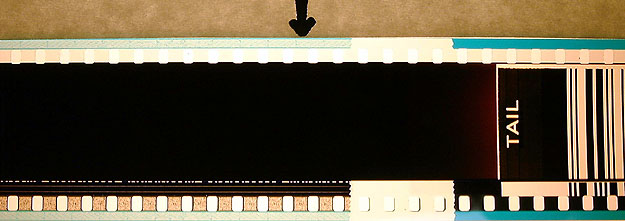
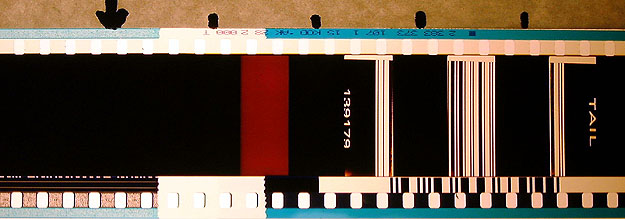
The tails are also very standard. What you are looking for is
the clear line beside the "tail" identification and count 8 perforations
over from that. These final two frames must be cut out to avoid a
complete drop out of the soundtrack.
BUENA VISTA
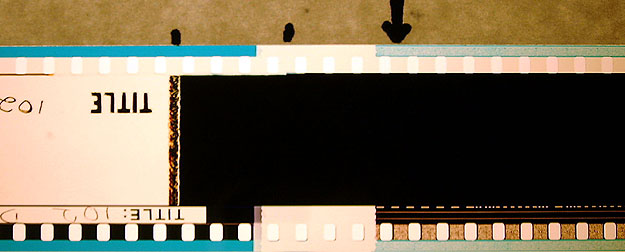
Another example of the Technicolor lab's leaders. However in
this example, you must cut 8 perforations over from the frame line marking
to avoid the soundtrack dropout.

Buena Vista trailers feature the need to hold the final two frames
up to the light. If only one frame of black was cut off, a horizontal
splice line would appear on the screen as that last frame passes through.
Instead the easy solution is to simply cut 8 perforations over from the
final frameline marking.
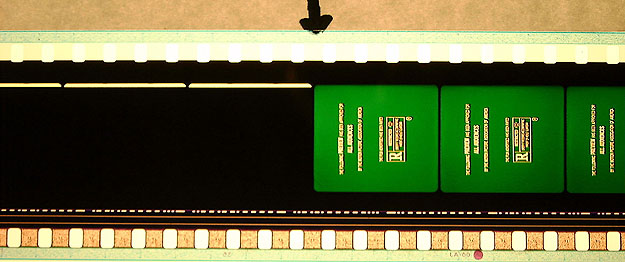
TECHNICOLOR HARD MATTE 1.85
Everyone has had their fun with these. These trailers are in
the flat format, but the picture is "letterboxed" to preserve the full
scope aspect ratio of 2.39 to 1. To find the frameline, look for
the printed "title" and hand written title markings. Note the extra
wide frame lines. The actual frame line is in the center of those
black spaces. (See the markings above.) Make sure when cutting
these that you do NOT go by that persuasive "frame line" which is actually
NOT on the frame line (center of the picture above). As with the
other Technicolor lab trailer leaders, 8 perforations must be cut over
into the black to avoid soundtrack dropouts.
Above shows where to cut the tail leader on these flat matted prints.
Again, you are looking for the actual "frames", such as the barcode as
a reference mark to find the frame lines. Then count over in 4 perforation
increments from there to avoid the soundtrack dropout.
TECHNICOLOR LAB's SURPRISE BROWN FRAMES
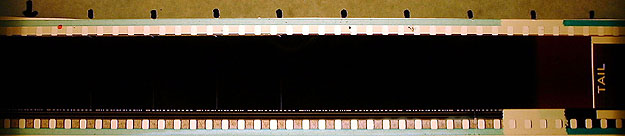
Here is a shot of a "surprise" tail leader from the Technicolor lab.
If you look extremely closely at the picture, just below the black frameline
markings you will see a clear indention in the picture area denoting the
frame lines. However, these trailers can NOT be cut 8 perforations
over from the "tail" frameline (right of picture). Instead you must
cut a full 8 or so FRAMES over from that mark, as when this is projected
to the screen, the black tail leader turns into a nasty brown leader!
Note the arrow on the left side of the picture above for the proper cut
mark.
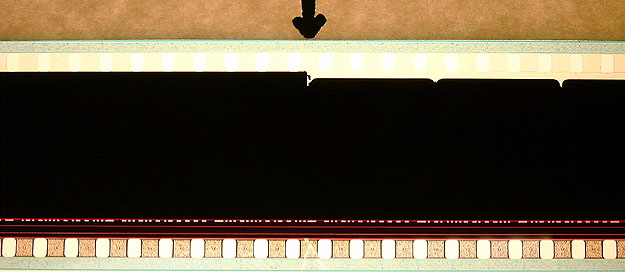
DELUXE LAB's SCOPE 1.85 MATTE
This is perhaps the worst example of a bad trailer leader in existence.
This is a scope format print of a flat trailer (side black bars).
Kudos goes to Deluxe for ensuring their "edge marks" are incredibly annoying
and absolutely MUST be cut out right at the green band. Quality control
at it's best!
The same goes for the tail leader on these prints. Fortunately
there is usually at least a couple of black frames on the tail that can
be preserved.
SPLICER MARKER
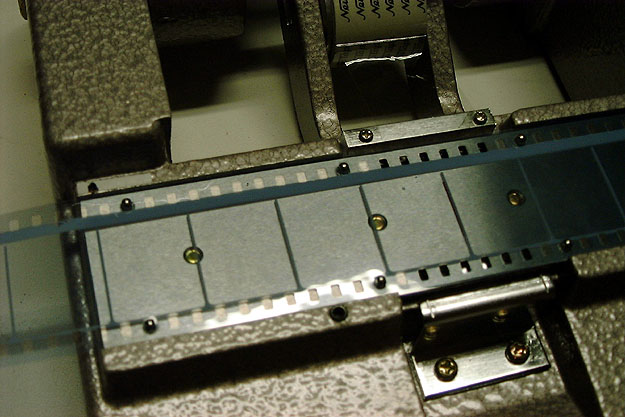
The tip spoken of above can be accomplished in this manner. Take
your splicer and lay a piece of frameline leader on it such that a frameline
is aligned with the cutting blade. Now make a mark at the left edge
of the splicer (or on a piece of tape as illustrated here) to denote "8
frames over". This saves considerable time for those "brown frame"
leaders as well as for the leaders which have negative dirt printed in
the soundtrack, as 8 frames can now be quickly and accurately chopped off
without a frame counter.
WINDING AND STORING TRAILERS
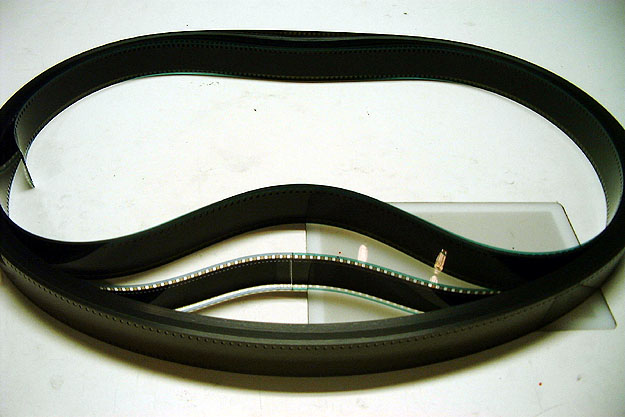
When the film is finished it's playdates, take the trailers off of
the center ring in this manner. Find the splice joining the first
to the second trailer (note the threading leader has already been removed
in this picture).
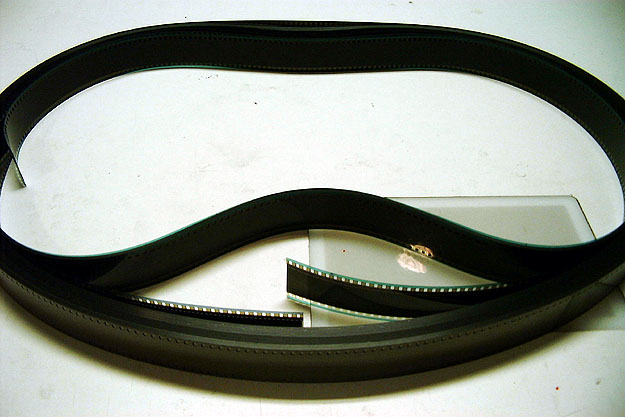
Now tear the splice between two fingers.
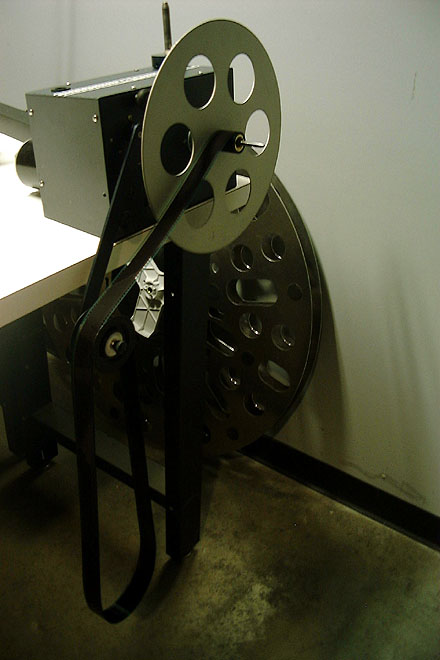
Set the film on your rewind table's auto-stop roller and wind directly
to a trailer core. This method provides the absolute least amount
of wear to the print during handling. Alternatively, if your theater
does not have one of these auto-stop roller assemblies, a roller can be
placed on the supply shaft to achieve the same effect.
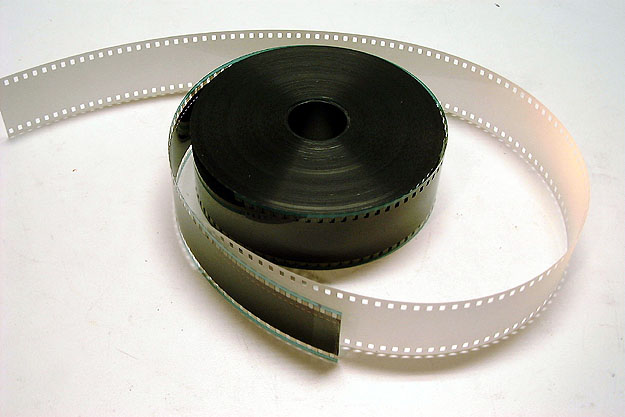
When the trailer is wound up onto the core, wrap a protective strip
of film around it. In this example, we are using white painted leader,
but any fresh piece of film will do. (It is recommended to "sacrifice"
an old trailer that was never used to cut up into a hundred different protective
strips.) Start with the strip about 2 feet long and "tuck" it inside
the head end of the trailer.
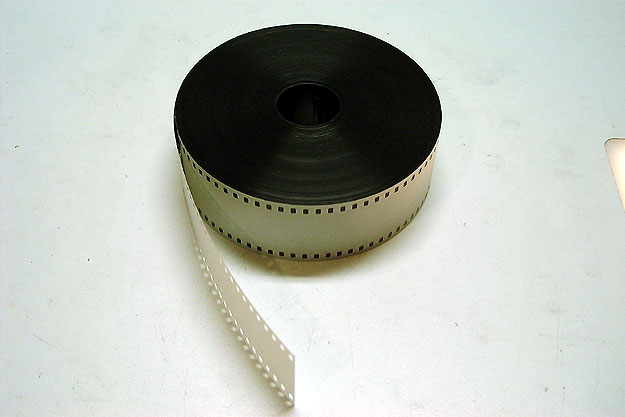
Now wrap that strip of protective leader fully around the trailer.
At this point it will be securely attached to the film.
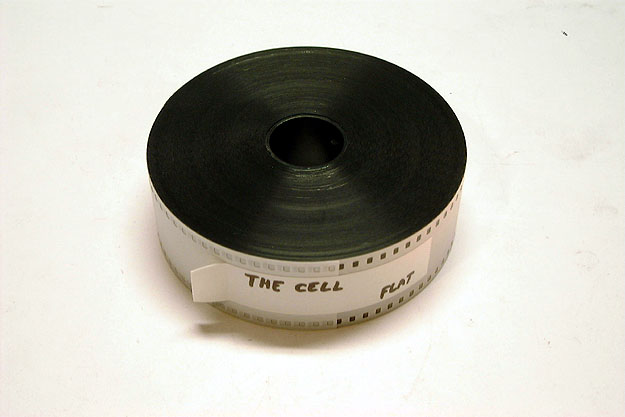
Now tape the end down and label it. This will provide full protection
from dust, fingerprints and scratches during storage.
INCORRECT METHODS OF WINDING TRAILERS
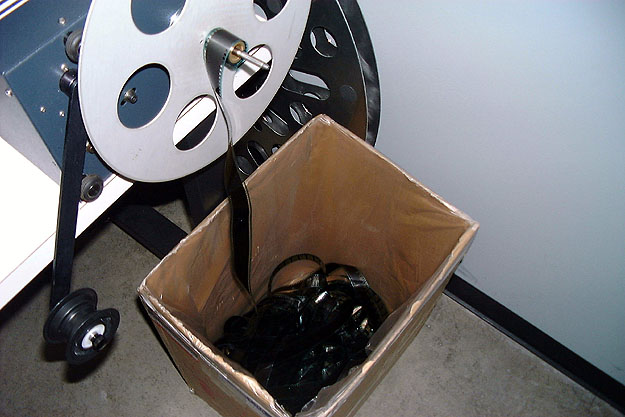
Pictured above is one poor way of handling trailers. As any dust
collects in the box and as the film rubs over itself, little tiny cinch
mark "scuff" scratches will be placed on the film. Granted these
marks are not horribly noticeable, but the film IS being scratched when
handled in this manner. The damage is most commonly noticed by little
dots where the emulsion has been scratched away. Should the film
tangle upon retrieval from the box, if the motor is not stopped quick enough
it can also cause folds in the film.
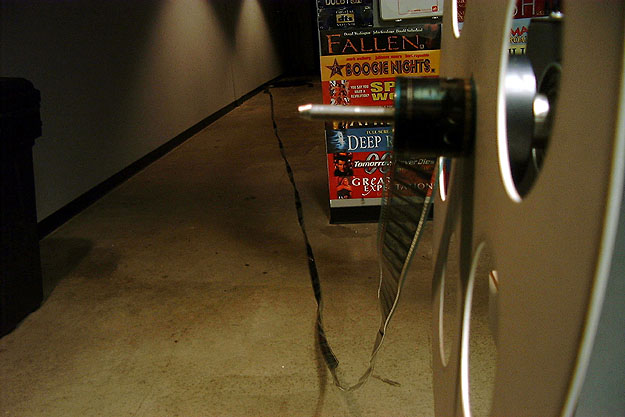
This is perhaps the worst possible method for rewinding trailers, yet
it happens every day
The booth floor was NOT meant to handle film!