Threading 101
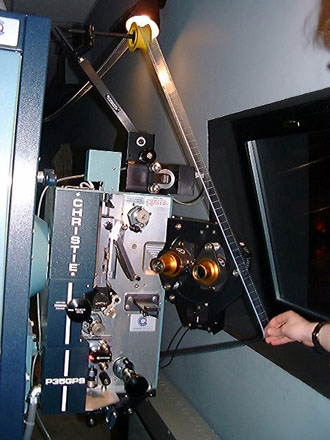
Threading the Projector
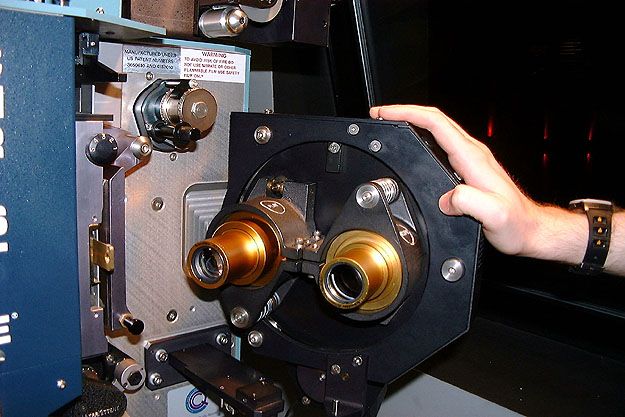
Open the lens turret by grabbing the outer edge and pull open, toward the screen.
Open the upper constant feed sprocket's pad roller. Simply press downward until it locks into the open position.
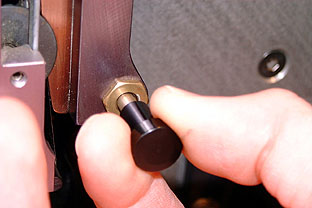
Open the gate/trap assembly by pulling on the knob and swinging it forward, toward the screen.
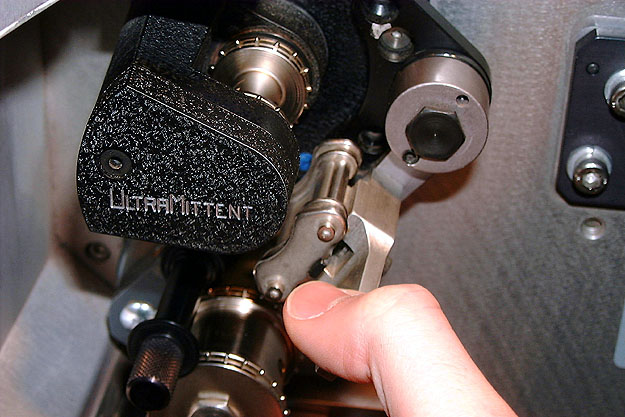
Open the intermittent shoe. This opens just like the pad rollers by pulling away from the sprocket.

Open the lower constant feed sprocket's pad roller.
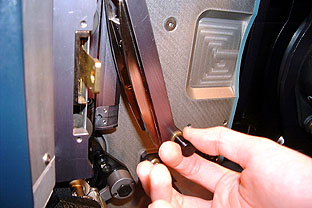
Finally, open the holdback sprocket's pad roller.
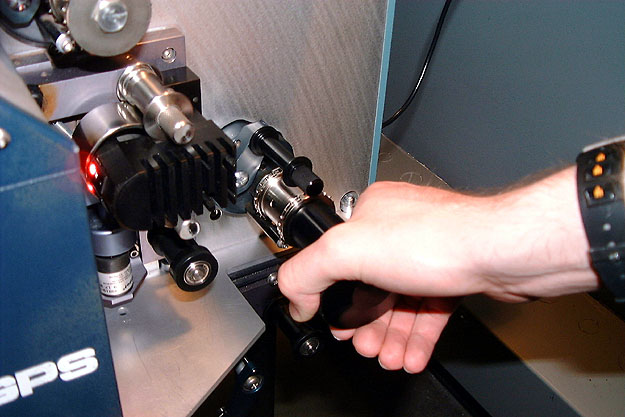
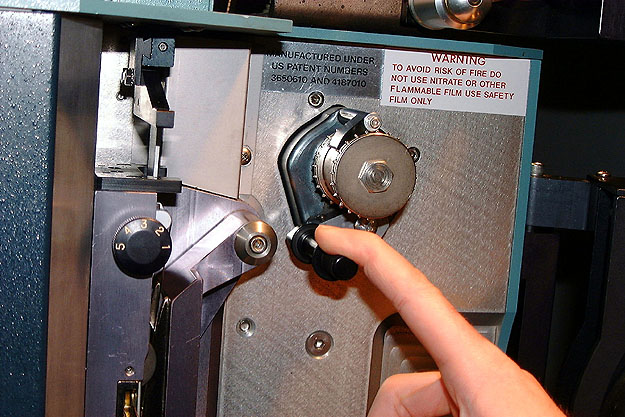
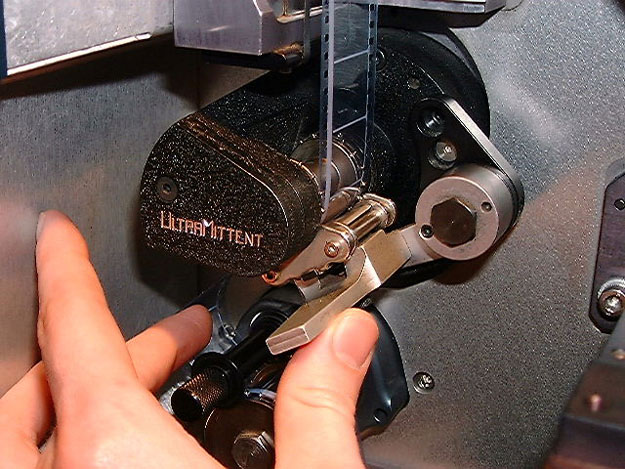
Turn the projector over by hand by grasping the handle and turning in a clockwise motion while watching the intermittent sprocket turn.
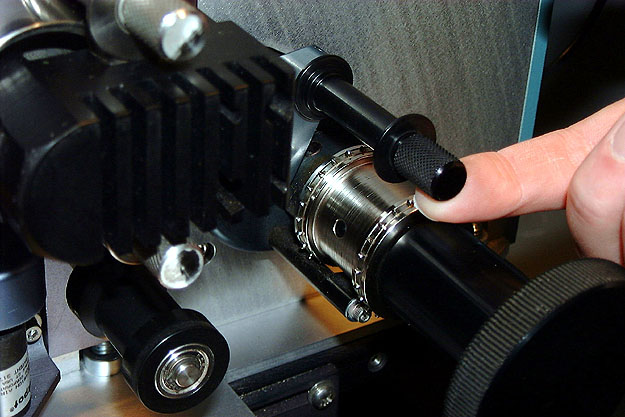
This is the intermittent sprocket. You are going to stop turning the motor by hand at the precise point it finishes it's pulldown cycle. (Notice as you are turning the motor that it will stop and start.) Go no further into the "dead zone". Make sure to stop turning the motor at the start of it, but be certain the pulldown cycle has completely finished.
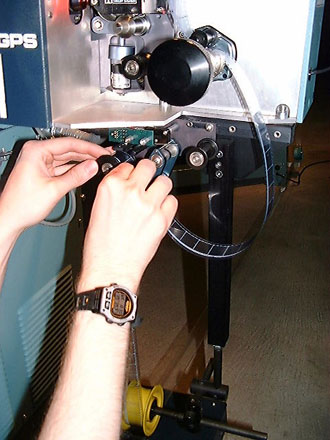
Now grab the film and pull slack from the TOP. You don't want to start the takeup mechanism just yet on the platter. Pull until you have enough leader to reach the lower magazine roller.
Without letting go of the film (the leader should NOT touch the floor), place the film with the soundtrack edge toward you on the holdback sprocket with one of the frame lines pointing straight up. (Note: the frame line position on the holdback sprocket will vary between projector makes and models.) Once the pad roller is clamped down onto the holdback sprocket, the film is secure.
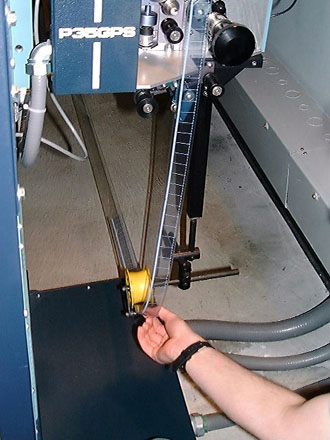
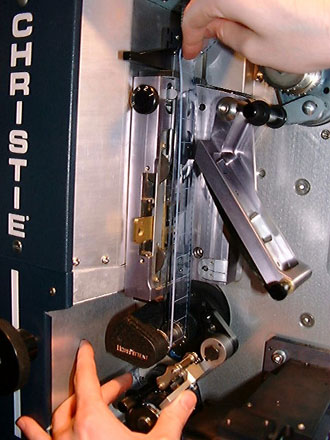
Next, grab the film at the lower magazine roller and pull in a relatively quick fashion all the way up to...

...the failsafe/cue detector. This one motion will start the takeup mechanism on the platter. Then, slowly let the slack out so the film does not slap onto the failsafe.
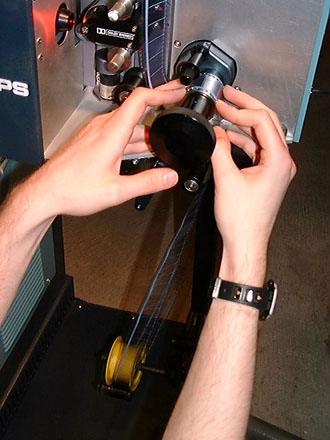
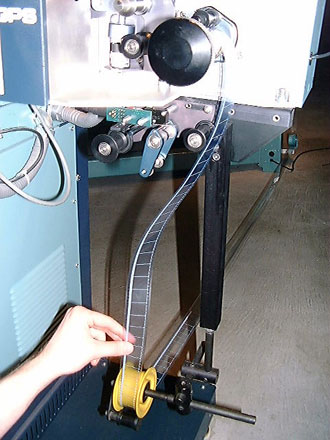
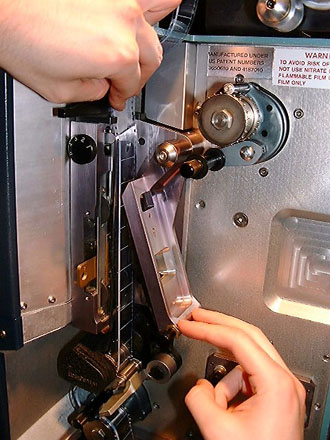
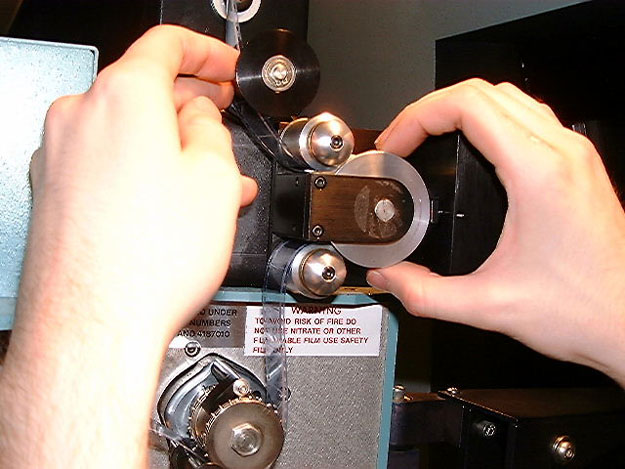
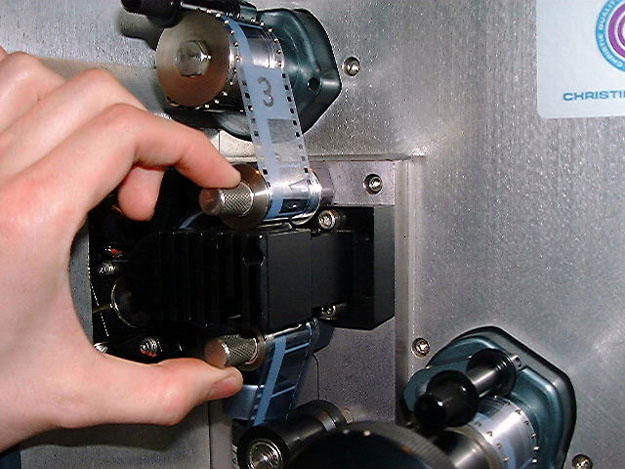
Now you are going to start threading the projector. Thread the film from the holdback sprocket (picture - right hand) through the soundhead assembly and up to the lower constant drive sprocket (picture- left hand). Adjust the tension on the soundhead by changing the film's position on the lower constant drive sprocket until there is just barely a noticeable "bounce" of the sounddrum's guide arms and no more. The film should NOT be pulled tightly between the sounddrum arms. Once you have achieved the proper tension on the soundhead, close the lower constant drive sprocket's pad roller.
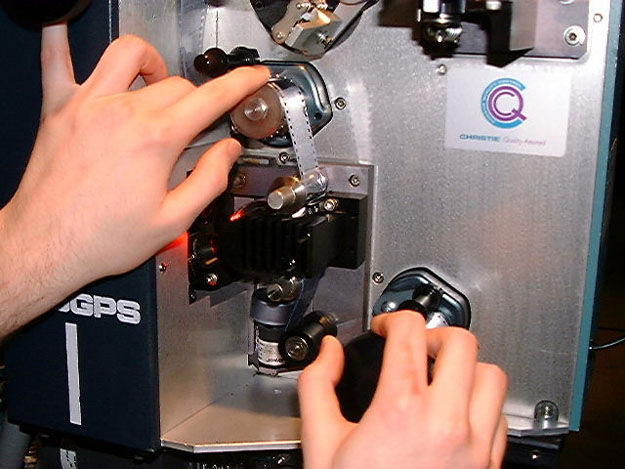
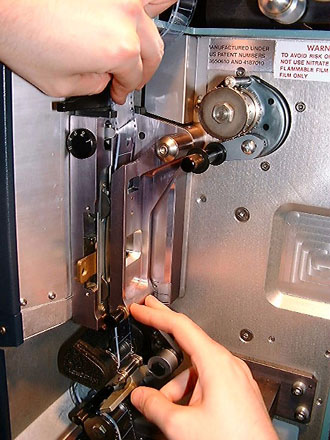
Now make a small loop with a finger from your left hand (note the 2nd finger) and pull the film taught between your two hands. Your right hand should be at the top of the gate and your left hand should be just below the intermittent, while the film is wrapped snugly around the intermittent sprocket. Adjust up and down a perforation or two if necessary to align the film "in frame" with the aperture. (More on this later.)
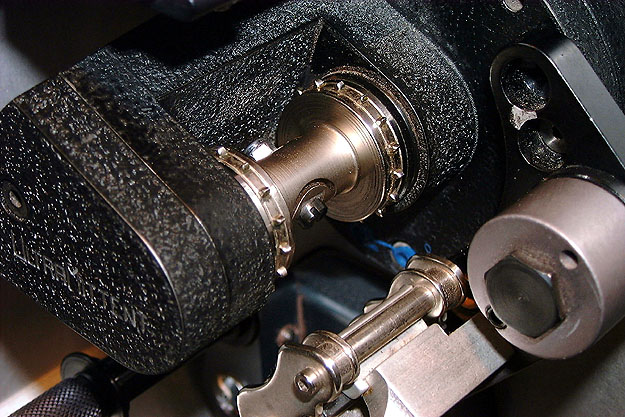
Then close the intermittent shoe. Remember, there should be a small loop of film between the intermittent sprocket and the lower constant feed sprocket. It is important to note that since the intermittent has been cued to a precise position before threading, this loop will be at it's largest position during threading.
Next, pull the film tightly with your left hand and make sure it is lined up straight with the gate bands. Then close the assembly with your right hand until it latches shut.
Make a loop between the gate and the upper constant feed sprocket and close it's pad roller. It is important to note that since the intermittent has been cued to a precise position before threading, this loop will be at it's smallest position during threading.
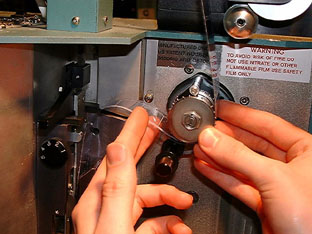
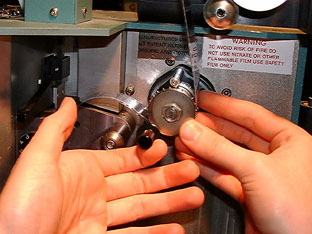
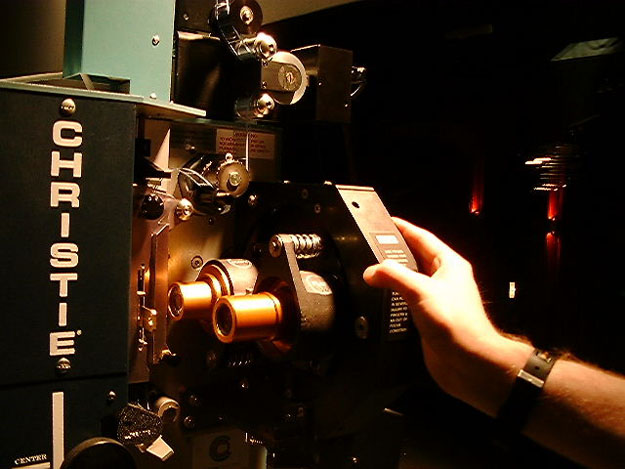
Finally, if your projector has a digital reader, thread it. Pictured here is a DTS reader.
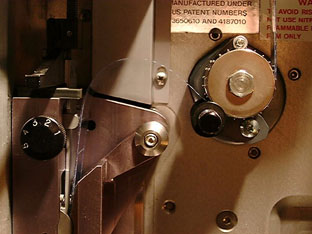
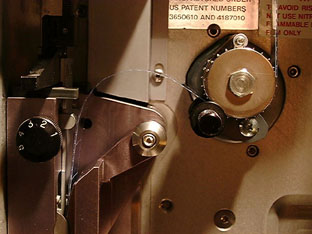
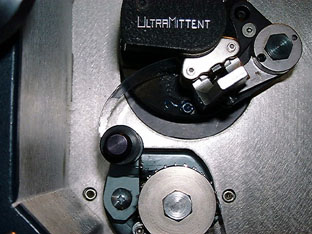
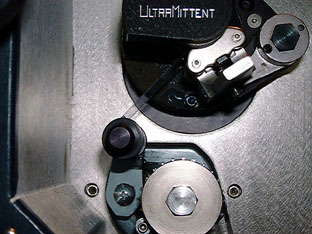
LOOP IN THE LARGEST POSITION LOOP IN THE SMALLEST POSITION
Now it is time to go back and check your threading. If you followed the tips exactly, everything will be perfectly on target, but you should ALWAYS double check anyway. Pictured above is the upper loop at it's largest and smallest position. To check this size, you MUST be turning the motor by hand as you originally did to set the intermittent. NEVER check a loop size without turning the projector motor over manually. This upper loop is especially important to ensure the film projects with the least amount of shake to the image as well as to ensure the digital sound plays in sync with the picture. Should you need to make an adjustment, open the upper constant drive sprocket to push or pull film into this loop to change it's size. Do NOT reopen the gate/trap assembly.
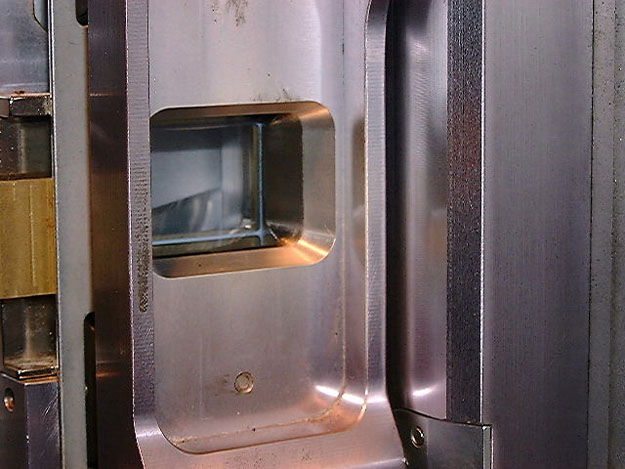
Now, while you are still turning the projector motor over by hand, watch to make sure each frame pulls down in the center of the aperture. On a Christie, so long as you can see two horizontal frame lines from the leader, it is in frame.
LOOP IN THE LARGEST POSITION LOOP IN THE SMALLEST POSITION
Now check the lower loop size by opening the lower constant feed sprocket pad roller. While still turning the motor over by hand, the film should snugly grasp the pad roller at it's smallest position. If this loop is any bigger than this, severe emulsion "standing scratches" will occur as the film slaps up against the underside of the intermittent. On the contrary, the loop should not be so small as to grab the pad roller, closing it shut. This loop size is also critical to ensure the analog sound plays in sync with the picture.
DON'T FORGET TO CLOSE THIS PAD ROLLER WHEN YOU ARE DONE CHECKING THE LOOP SIZE!!!
Finally WITHOUT turning the motor, grasp the two guide arms and gently squeeze them toether. There should only be the slighest "bounce" up and down. If you were to open the holdback sprocket's pad roller and allow one more perforation of film into the soundhead, the two guide arms should no longer have a bounce. Should more or less film need to be adjusted here, open the holdback sprocket's pad roller and make the adjustment there. It is important to note that this adjustment is the ONLY one that should be checked WITHOUT turning the motor over by hand.
Finally, close the lens turret and check over ALL of the rollers in the platter's path to ensure the film is properly seated before starting the show.
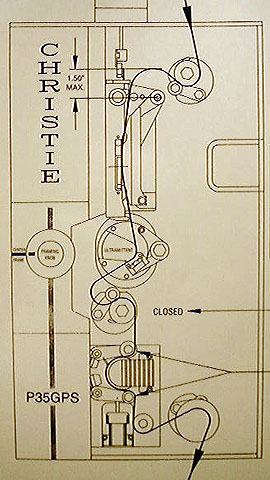
For clarity, here is a threading diagram of the Christie projector.